Invoice branding
Put your logo, address, phone and footer on every invoice, and give your invoices a brand color or cover image and your own message.
Add your logo and invoice details
Your logo, business address, phone, email, website and footer are company settings: set them once and every invoice this company sends carries them, in the preview, the PDF and the PDF attached to the invoice email.
Go to Settings › Company, or click Add your logo (Change logo once you have one) at the top of the Branding panel on a draft invoice.
In Invoice details, click Upload logo and choose a PNG, JPEG or SVG file up to 2 MB. It's saved straight away; Replace logo swaps it and Remove takes it off.
Fill in the address, Phone, Invoice email, Website and Footer, then click Save invoice details.
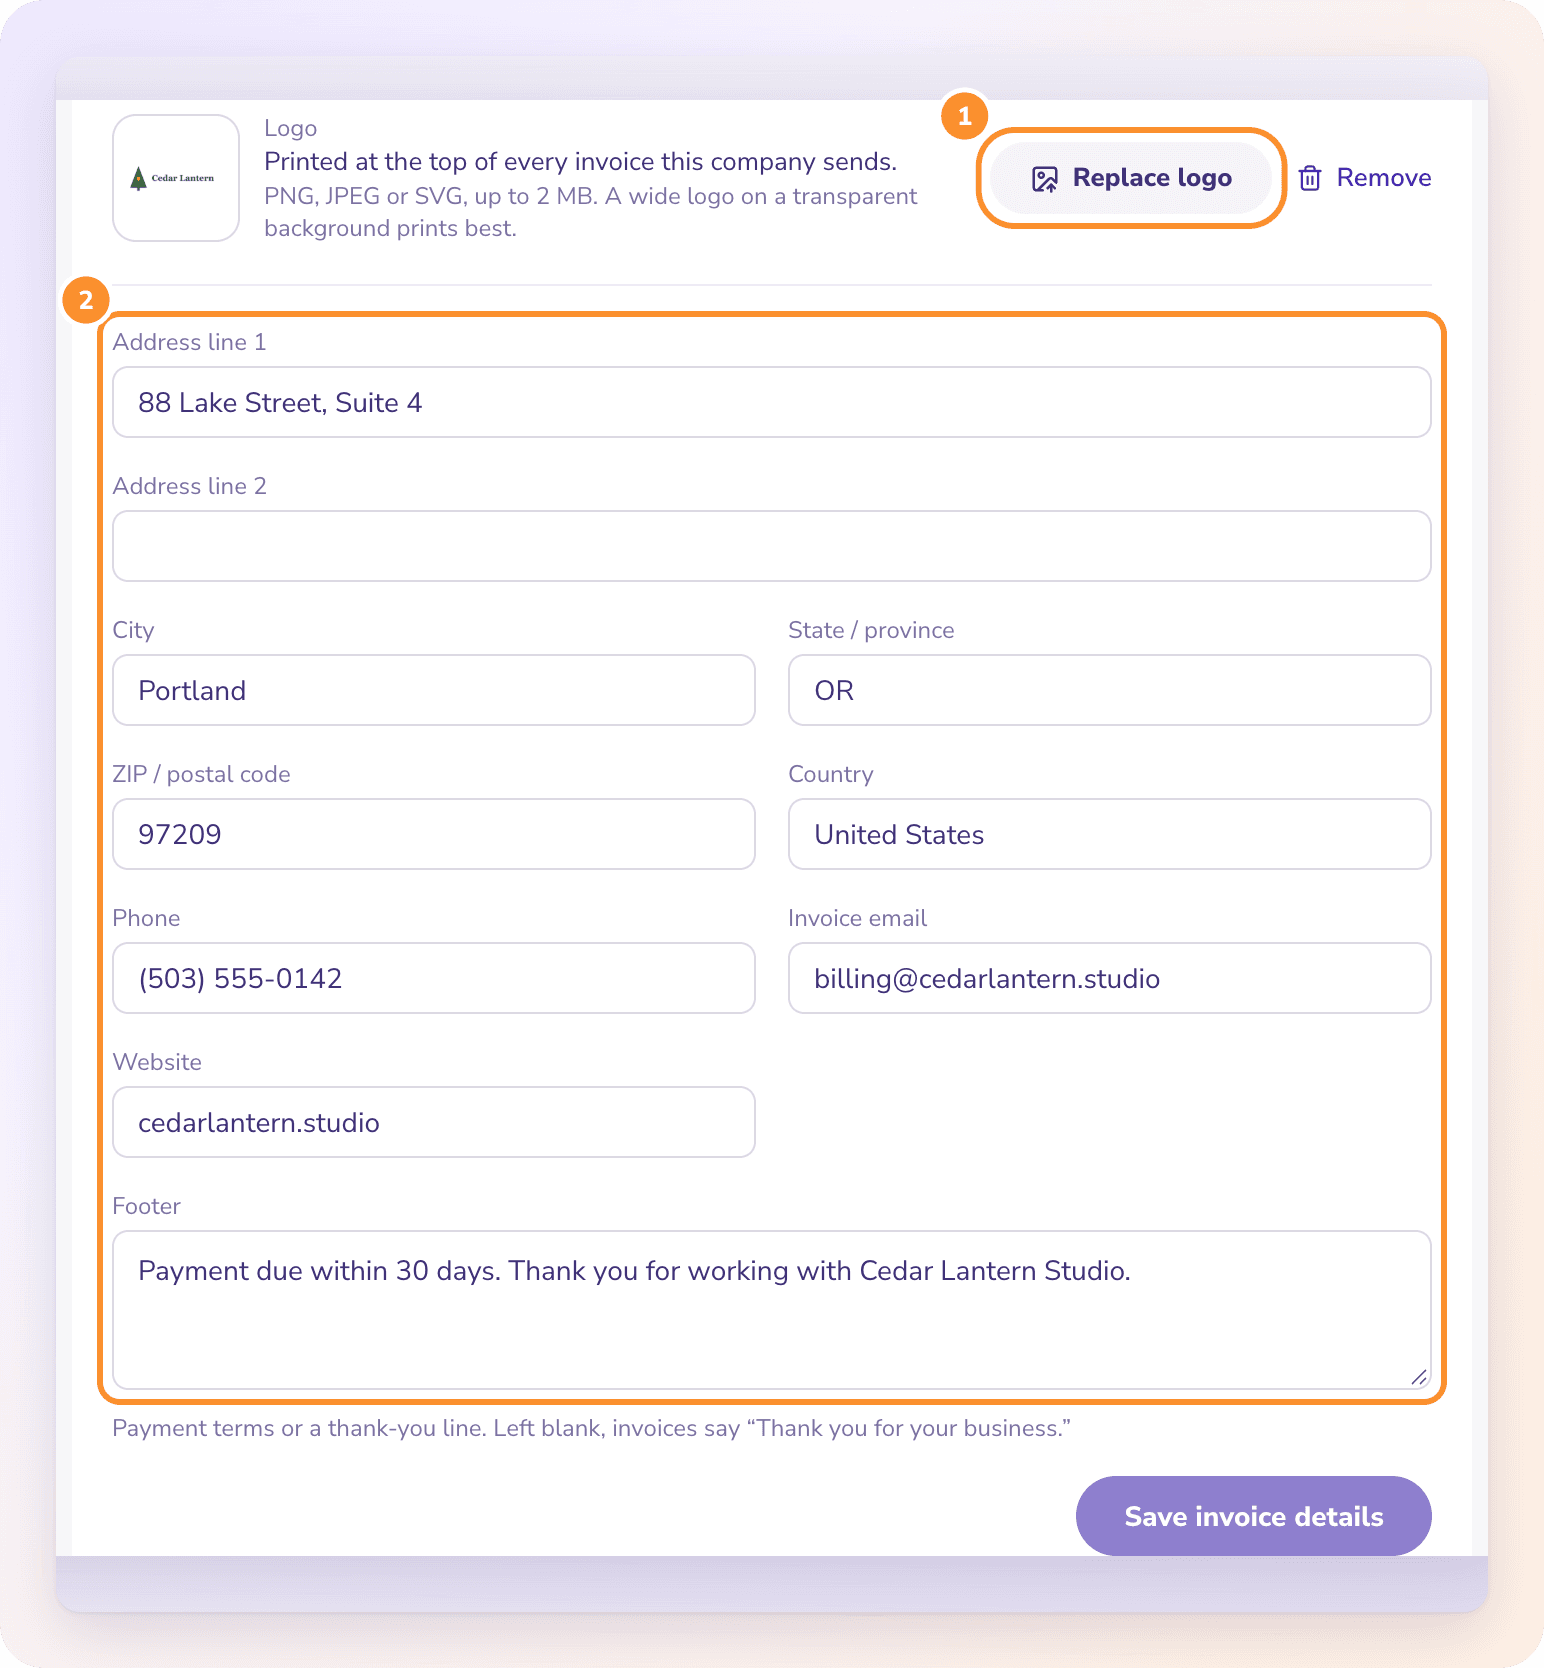
Tip: A wide logo on a transparent background prints best. An SVG logo is converted to a high-resolution PNG when you upload it, because invoice PDFs can only hold PNG or JPEG images.
Leave Invoice email blank to use the company's Contact email, and leave Footer blank to print "Thank you for your business." Blank address lines are simply left off.
Choose a color or cover
Open a draft invoice. (The Branding panel is only on drafts.)
On the right, the Branding panel says Select one. The top row has 16 colors; the bottom row has cover images. Use the arrows to scroll.
Click a color or a cover. The invoice header changes at once.
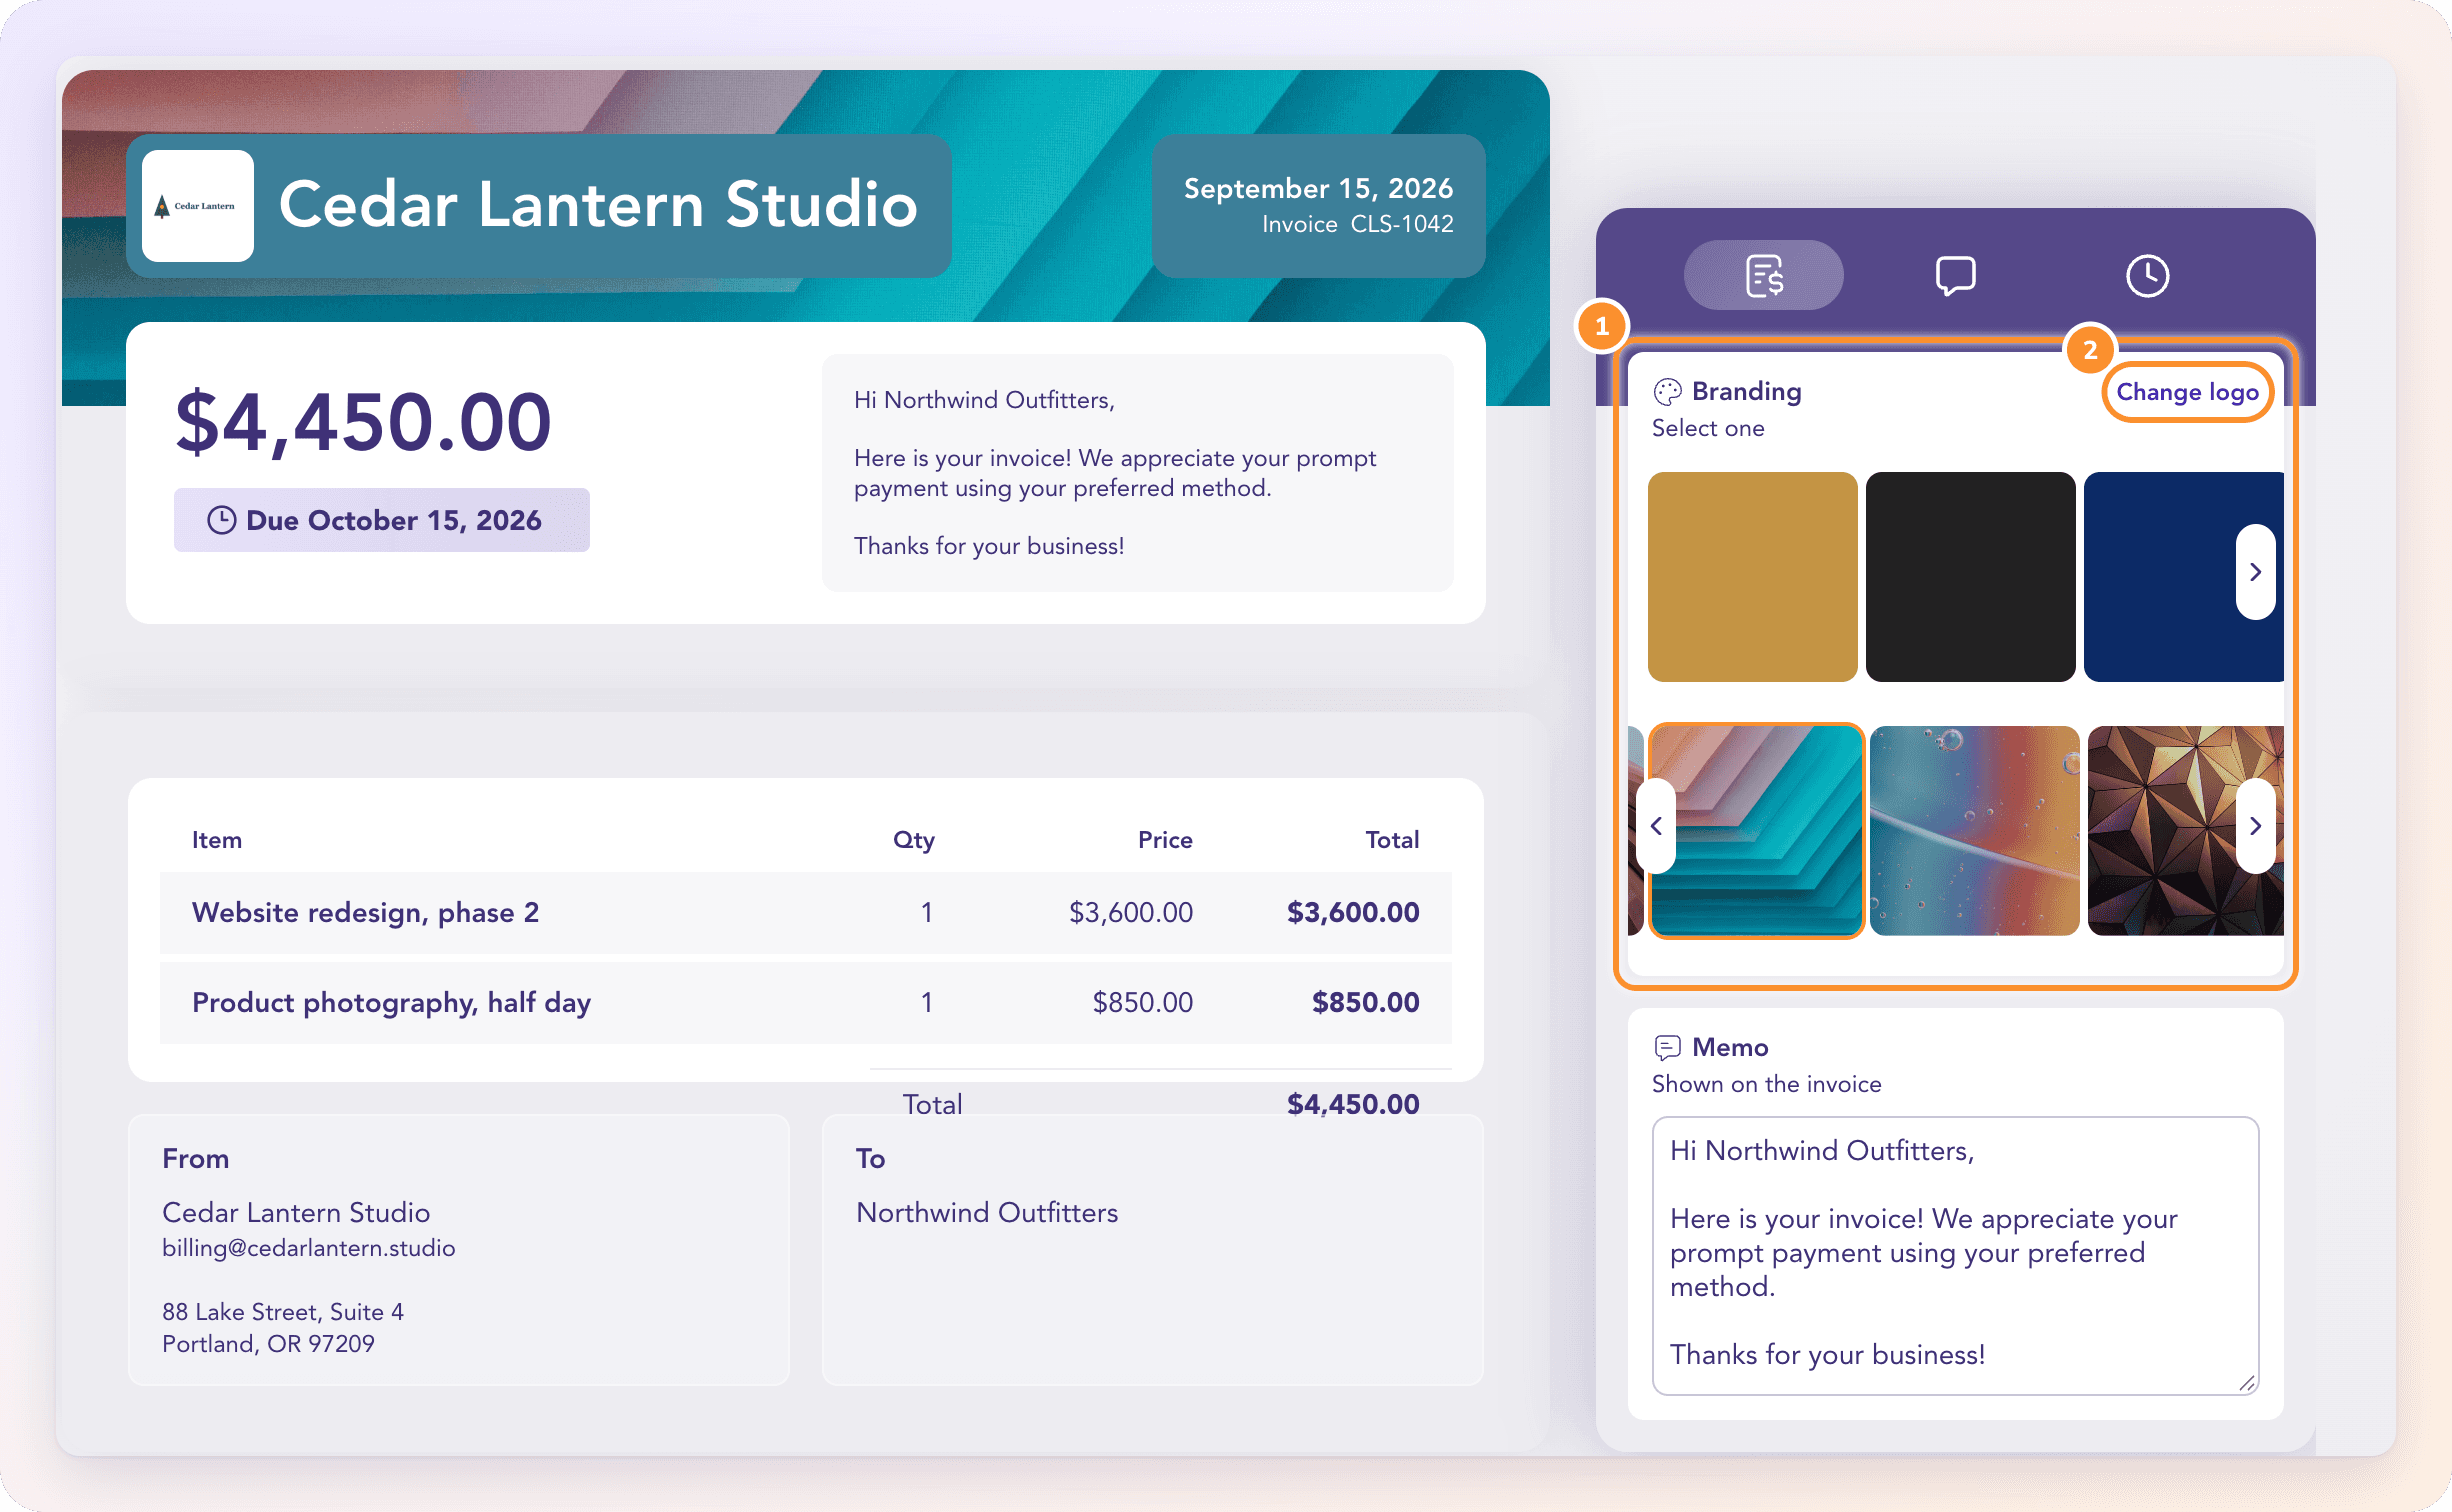
Your choice is saved for the whole company, not just this invoice, and every invoice PDF uses it from then on. The color (or the cover's main tone) is also the accent color of the invoice PDF.
Write the message
Under Branding, the Memo box ("Shown on the invoice") holds the message for your customer. It's printed on the invoice and is also the starting text of the invoice email.
What appears on the invoice
| On the invoice | Where it comes from |
|---|---|
| Logo | Invoice details in Settings › Company; without one, your company's initials |
| Company name | Your company name, in Settings › Company |
| Address, phone, website | Invoice details in Settings › Company |
| Invoice email, or the company's Contact email when that's blank | |
| Tax registration number | Tax registration number in Settings › Company ("Printed on the invoices this company sends.") |
| Customer name, email and address | The customer's record |
| Footer | Footer in Invoice details, or "Thank you for your business." |
To change the company name, contact email or tax number, go to Settings › Company and click Edit company. See Company settings.
Frequently Asked Questions
Can I upload my logo?
Yes. Go to Settings › Company › Invoice details and click Upload logo. PNG, JPEG and SVG files up to 2 MB work; an SVG is converted to PNG as it uploads.
Why was my logo file refused?
It must be a PNG, JPEG or SVG of 2 MB or less, and no larger than 8,192 pixels on a side. WebP and GIF files aren't accepted: save the logo as PNG and upload it again.
Does changing the branding or logo update invoices I already sent?
Emails you already sent don't change. But the invoice PDF is built from your current settings each time, so if you resend or download an older invoice, it carries the new branding, logo and details.
Can each client company have its own branding?
Yes. The logo, invoice details and branding are saved per company, so each client's invoices carry that company's own.
How do I put payment terms or bank details on my invoices?
Type them in Footer under Settings › Company › Invoice details, up to 1,000 characters. ZeraBooks doesn't take payments for you, so the footer is the place to tell customers how to pay.
Can I add custom fields to an invoice?
No. Use the Reference Number for a PO or job number, and the memo for anything else your customer needs to know.
Learn more about AI-native general ledger: A double-entry ledger where statements become proven transactions.
Still stuck? A real person reads every message—come say hello.